Create new forms and surveys quickly and simply, without requiring extensive technical knowledge. To get started, view the following guides from Microsoft:
- Collaborate on the creation and review of forms in Microsoft Teams: Microsoft | Work with colleagues to create, edit, and review forms in Microsoft Teams
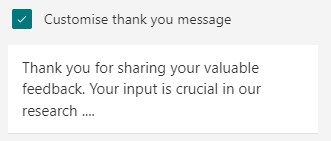
- Customise your thank you message: once a form responder submits their answers, the customised message will be displayed on a thank you page. To do this, select the Settings icon and scroll down to 'Customise thank you message', remove the default 'Your response was submitted' and enter your own customised message.
- Allow respondents to save or edit their responses: while it may be helpful to allow respondents save a copy of the responses they submitted, consider the nature of the information before allowing respondents to edit their responses, i.e. if you need to capture specific information at a specific time, allowing the editing of the responses will be of no value. Otherwise, this may be useful if requesting feedback and if you wish to allow respondents to return to the form later to add further information.
- Increase your reach by connecting to audiences where they are: Microsoft Forms integrates with other Office 365 apps so that you may collect input during meetings, classes, via Teams classes or departmental teams, and much more. For further information on MS Forms integration, refer to the following guides:
- Use branching options to ensure respondents only answer the questions they need to answer. This is one of the most powerful features of Forms that personalises the survey experience for each respondent. For information on how to use branching login, refer to the following: Microsoft | Use branching logic in Microsoft Forms
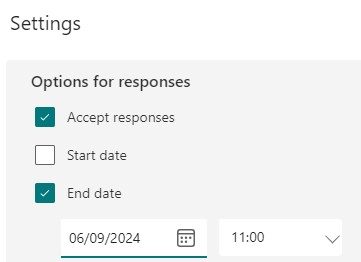
- End the form submission period automatically, by selecting the Settings menu and then adding an end date:
- Leverage the value of templates to save time. On opening Microsoft Forms, templates are available to browse across the top of the screen.
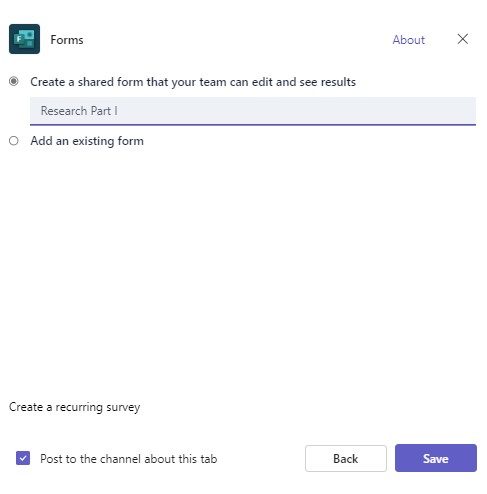
By setting up a MS Form on a Microsoft Team, this means that there is no single owner of the form, but the team becomes the owner; this will ensure ownership can be passed on and recovered in the event that the form creator is unavailable. This enables multiple team owners and members to collaborate on the creation of the form. Please be aware that this also means that anyone with access to that team (owners and members), will have access to the replies submitted by any form respondent. To setup a MS Form via MS Teams:
- Open the required team or create a new team, and select 'Add a tab' from the top menu bar.
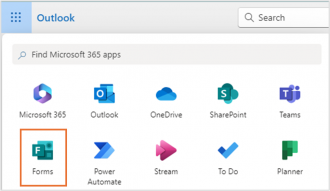
- Select Forms from the list of available apps.
- Add a title for the form and Save.
- The following screen will appear, allowing you to build and design your form, as required.
Specify to whom you wish to share your form and collect responses: Microsoft | Share a form
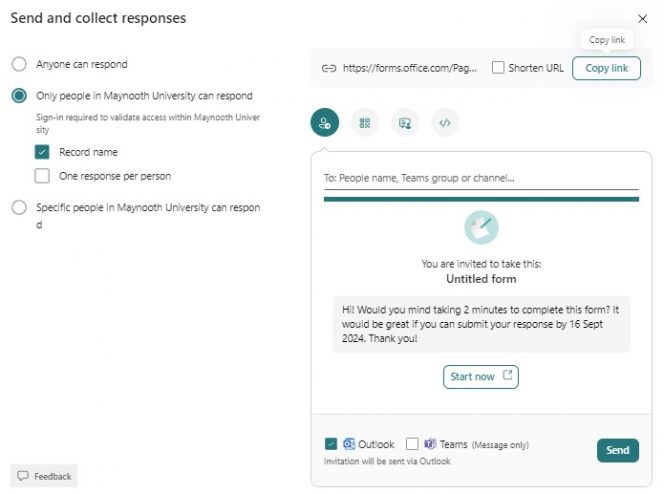
Anyone you collaborate with will also see the results, so be mindful of how you are sharing the form. If you wish to collect responses, select 'Collect Responses':
A dialog box will appear offering multiple ways to share your form:
By default, and unless you explicitly share a file, folder or form with one or more people, your documents stored in Office 365 are protected from public view. When sharing a file, folder or form, be mindful of what options you choose, e.g. by choosing 'Anyone', you are making your Microsoft document or form, and potentially data contained within the form, available to all staff and students of the university. This poses a potential breach of the personal data of those whose data is contained within the document or form. Be specific and only share your file or form with whoever needs access. As Data Controller, you are responsible for the security of the personal data processed on the Form. For more information, review the following guides:
Many data breaches in some way relate to genuine mistakes or human error involving the disclosure of personal information. Therefore, it is critical to be aware of the sharing process and some of the common errors that can result in potential data breaches. Information on your obligations under data protection legislation when using MS Forms is available here (pending URL link). Ensure to be 'transparent' when using MS Forms by providing data protection information (pending template link). For detailed information relating to Data Protection, how best to avoid breaches and what to do if a potential breach occurs, refer to the following guidance from the Data Protection Office:
You may choose to view your results in real-time or refer back to them later for export and more detailed evaluation in Excel. To view your results, refer to the following Microsoft guides:
If you are collecting personal data in an MS Form, you, as Data Controller, must ensure that the processing is compliant with data protection legislation. Please ensure to share the link to Collect Responses rather than share the collaboration link which could result in a breach. For further information on remaining compliant, please review the information supplied on the Data Protection Office webpage.
